Are you looking for a versatile, eye-catching marketing tool? The humble sandwich board is perfect. It can be customized for outdoor displays, mobile coffee carts, or home decor. This guide will show you how to make your own DIY sandwich board. We’ll cover materials, assembly, painting, and customization options.
Key Takeaways
- Sandwich boards can be made from wood or MDF (Medium-Density Fiberboard), with MDF being the recommended choice for its weatherproof and smooth painting characteristics.
- Typical size variations for sandwich board signs include 2-1/2’x2′ and 3’x1-1/2′, allowing for versatile display options.
- Assembly requires basic hardware like hinges, chains, screws, and handles, with a simple process of drilling holes and attaching the components.
- Painting the sandwich board involves a base coat of white, followed by acrylic paints or chalkboard paint for customization and versatility.
- Sandwich boards can be designed for outdoor advertising, event signage, or even used as a unique home decor piece, making them a highly versatile DIY project.
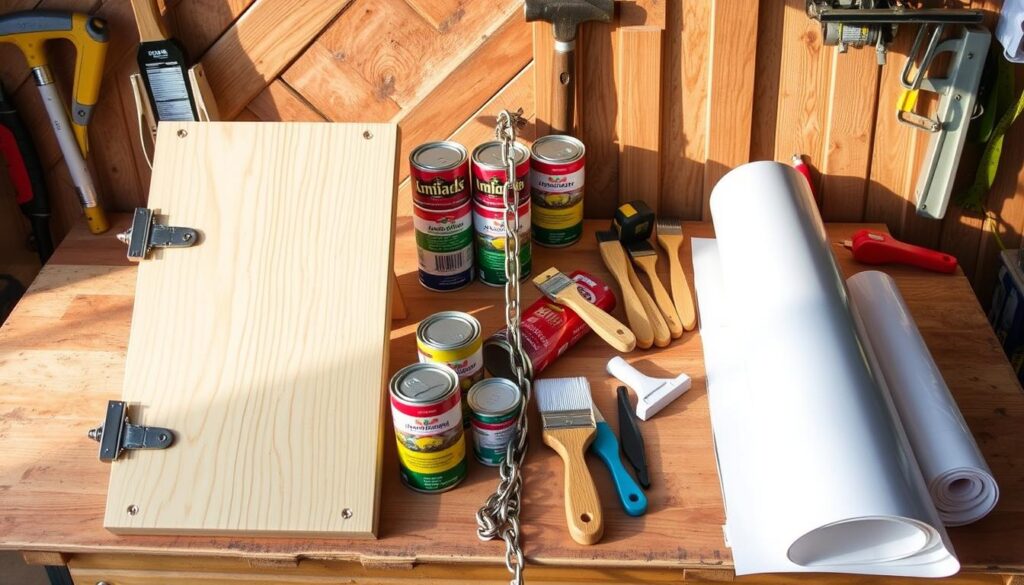
Materials Needed for Making a Sandwich Board
To make a DIY sandwich board, you need a few key items. First, get two pieces of particle board or plywood, about 2’x4′ or 3’x1.5′. They should be 3/8″ to 1/2″ thick for durability. These sandwich board materials are the base of your display.
Next, you’ll need hinges and screws to hold the boards together. This sandwich board construction supplies makes a strong, foldable frame. Lastly, a chain or handle is needed for easy moving and setting up your DIY sandwich board.
With these basic affordable sandwich board materials, you can make a custom board. It can be a great outdoor ad or indoor display. These materials are popular for both businesses and individuals.
- Particle board or plywood (2’x4′ or 3’x1.5′, 3/8″ to 1/2″ thickness)
- Hinges and screws
- Chain or handle
With these parts, you can build a solid and useful sandwich board. It will help spread your message or brand well.
Assembling the Sandwich Board Frame
Building a strong sandwich board frame is key to making a great DIY sign. Start by measuring and cutting the boards to the right size. Make sure there’s a small gap between them for the hinges. This gap helps the boards open and close smoothly.
After cutting the boards, it’s time to attach the hinges. Place the boards together and put the hinges inside, facing the right way. Drill holes and screw the hinges onto the boards. This makes the sandwich board easy to fold and carry.
- Measure and cut the particle boards or plywood to the desired size, allowing for a slight gap between the two boards.
- Lay the boards end-to-end and position the hinges on the inside of the frame, facing the correct direction.
- Drill pilot holes and secure the hinges to the boards using the appropriate screws.
By following these steps, you’ll have a solid sandwich board frame ready for the next part of your DIY project. Paying close attention to detail here will make your sandwich board construction a hit.
Attaching the Chain or Handle
To make your sandwich board easy to carry, attach a chain or handle to the top. This simple step lets you move and place your DIY board wherever needed.
First, figure out the chain or handle’s length and where to put it. Measure the top of your board and pick a spot for the attachment. Then, drill holes for screws to hold it in place.
- Choose a sturdy chain, about 20 inches long, for a comfy carry.
- Use 4 screws with wide heads, smaller than 3/4 inch long, to attach the chain securely.
- Or, pick a handle if you move your board a lot. It might be easier.
Align the chain or handle and screw it in place. Ensure it’s tight and won’t fall off while moving. Now, your sandwich board is ready for anything, whether it’s diy sandwich board transportation or a portable sandwich board display.
“With a sturdy chain or handle, your sandwich board becomes a breeze to move and set up. It’s the perfect DIY solution for easy, on-the-go advertising!”
Painting and Decorating the Sandwich Board
Get creative and turn your DIY sandwich board into a stunning piece! Start with a base coat of paint, whether it’s classic white or a bold color that matches your style. Use top-notch outdoor paints and sealants to make sure your sandwich board looks great for years.
Base Coating and Painting Tips
Take your time with the base coat for a smooth finish. Paint evenly, letting each layer dry before adding more. Use a roller for big areas and a brush for details. Lightly sand between coats for a smooth, customizable sandwich board look.
Adding Graphics or Chalkboard Paint
After the base coat dries, get creative! Add cool graphics, patterns, or a chalkboard surface for messages. Chalkboard paint lets you change your message anytime. Try different chalk pen colors and styles for a striking display.
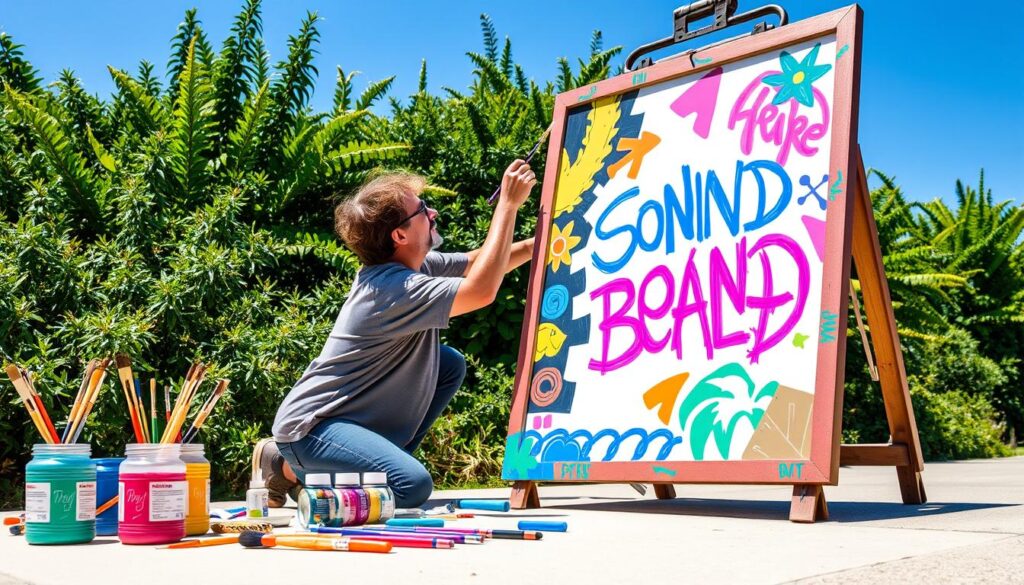
Choose a simple or bold design for your sandwich board decor. The most important thing is to have fun and show off your creativity. With effort and imagination, your DIY sandwich board will attract customers and stand out.
how to make a sandwich board
Making a DIY sandwich board is a fun and practical project. It’s great for showing off your cooking or promoting your business at events. It can be a mobile menu, a catering display, or even a fashion statement.
To start, you’ll need some basic supplies: particle boards or plywood, hinges, screws, and a chain or handle. Measure and cut the boards to the size you want. Then, attach the hinges to make it foldable. Add the chain or handle for easy carrying. Finally, get creative with painting, decorating, or chalkboard paint.
The best part about a sandwich board is how customizable it is. You can design it for any occasion, from festive holidays to modern ads. Try out different materials, colors, and graphics to make it unique.
The secret to a great sandwich board is finding the right mix of looks and usefulness. It should grab attention, be informative, and easy to carry. With some creativity and care, you can make a board that wows your guests and highlights your offerings or business.
So, whether you love DIY projects or plan events, try making a sandwich board. It’s a versatile, affordable, and fun way to show off your skills and connect with people.
Customizing Your Sandwich Board Design
Sandwich boards are great because you can make them your own. They’re perfect for yard sales, parties, retail displays, and more. Let your creativity shine and make your sandwich board a standout.
Ideas for Different Occasions
Need to impress at a party or show off your products? A customized sandwich board can do the trick. Here are some ideas to get you started:
- Yard Sales: Use bright colors and bold text to grab attention. Add fun graphics or hand-lettered messages for a unique touch.
- Parties and Events: Turn your sandwich board into a party decoration. Add balloons, streamers, or a chalkboard for guests to write on.
- Retail Displays: Create a professional-looking sandwich board. Use great graphics, fonts, and messages to attract customers.
- Specials and Promotions: Update your daily specials with a chalkboard or dry-erase surface. It’s a great way to keep customers interested.
Customizing your sandwich board is all about expressing your style and brand. It’s a chance to make your event or business stand out.
Portable Sandwich Board Options
There are many portable and collapsible sandwich board choices. These lightweight designs are easy to carry and set up. They’re great for events, outdoor ads, or temporary signs.
The Signicade A-frame sandwich board is a favorite. It weighs 18 lbs and fits 36″ x 24″ coroplast signs. It folds up with a handle for easy moving. You can save money by buying more than one.
The 19 lbs sandwich board sign is also versatile. It has 2ft x 3ft print sizes on durable 4mm coroplast. The gray PVC frame can hold water or sand for stability. Plus, it’s double-sided for more visibility. Free design services are included for custom graphics.
| Feature | Signicade A-Frame | 19 lbs Sandwich Board |
|---|---|---|
| Weight | 18 lbs | 19 lbs |
| Print Size | 36″ x 24″ | 2ft x 3ft |
| Material | Coroplast | 4mm Coroplast |
| Frame | Gray PVC | Gray PVC |
| Filler | Water or sand | Water or sand |
| Printing | Full CMYK | Full CMYK |
| Sides | Double-sided | Double-sided |
Need a portable sandwich board for your business or an event? These lightweight and collapsible options are perfect. They come in various sizes, materials, and designs to fit your needs.
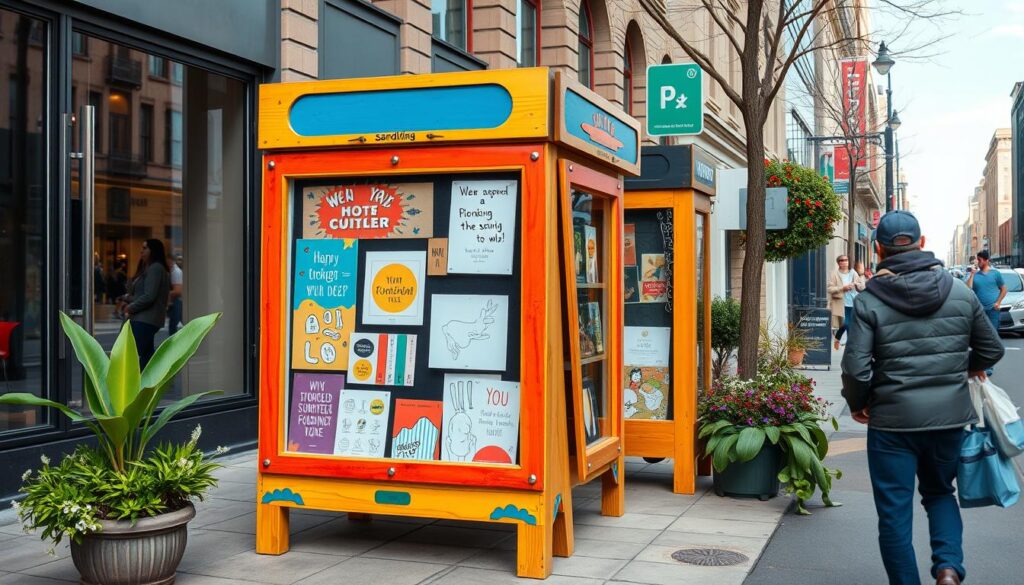
Creative Sandwich Board Signage Ideas
Sandwich boards are great for businesses, both indoors and outdoors. They are affordable and make a big impact. Cafes, boutiques, food trucks, and pop-up shops can all use them to attract customers.
Outdoor Advertising Strategies
Putting a sandwich board in busy spots can grab people’s attention. Businesses can highlight deals, events, or their brand in a fun way. Adding food puns, changing messages, or interactive quizzes can make it even more engaging.
Indoor Display Ideas
Sandwich boards work well indoors too. They can be used in stores, at events, or in offices. They’re perfect for showing off new items, local artist collaborations, or secret deals. Adding social media tags or logos can make them even more effective.
| Outdoor Sandwich Board Ideas | Indoor Sandwich Board Ideas |
|---|---|
| Promote special offers or events Incorporate playful food puns Rotate promotional messages regularly Include interactive elements like quizzes | Showcase new products or collaborations Create a sense of mystery around limited-time offers Integrate social media hashtags or branding Establish a welcoming atmosphere with local art or music |
Sandwich boards are a smart choice for both outdoor and indoor ads. They help businesses make a strong impression and connect with customers. With creative ideas, businesses can attract more people, increase foot traffic, and boost their brand.
Conclusion
Making your own diy sandwich board is easy and very flexible. It can be used for outdoor ads or indoor event signs. This guide shows you how to make a strong and good-looking sandwich board that fits your needs.
Looking to promote your business or decorate your home? A DIY sandwich board is a smart choice. It’s affordable and can add a special touch to any event.
The design of your sandwich board can be anything you want. You can use different materials, colors, and themes. This lets you create a sandwich board that shows off your style and brand.
From simple chalkboard designs to bold graphics, the choices are endless. You can use your sandwich board to guide people, advertise, or even decorate. It’s a great way to add flair to your space.
The sandwich board benefits are clear. It’s cheap, lasts a long time, and can be used in many ways. This guide is perfect for anyone who wants to make a diy sandwich board. It’s great for DIY fans and beginners alike.
FAQ
What materials are needed to make a DIY sandwich board?
You’ll need two pieces of particle board or plywood, about 2’x4′ or 3’x1.5′. You’ll also need hinges and screws to connect them. Plus, a chain or handle for easy transport.
How do I assemble the sandwich board frame?
First, cut the boards to size, leaving a gap for the hinges. Place them end-to-end and mark where to put the hinges. Drill holes and screw them in place.
How do I add a chain or handle to my sandwich board?
Attach a chain or handle to the top for easy carrying. Choose the length and spot, then drill holes and screw it in. This makes moving your board simple.
What are some ideas for customizing my DIY sandwich board?
You can customize your sandwich board for any event or business. Use it for yard sales, parties, or as a chalkboard for daily specials. It’s a versatile tool for creativity.
What are the benefits of using a portable or collapsible sandwich board?
Portable and collapsible boards are light and easy to carry. They’re perfect for events or temporary signs. They’re simple to set up and take down.
How can I use a DIY sandwich board for creative signage?
Sandwich boards are great for creative signs indoors and outdoors. Outdoors, place them in busy spots to advertise. Indoors, they’re perfect for retail displays or office use.